Blog

  • Easy Two-Loaf Artisan Sourdough with a tiny touch of yeast

    Easy Two-Loaf Artisan Sourdough with a tiny touch of yeast

    There is something incredibly satisfying about pulling a loaf of homemade sourdough from the oven.

    The crackling crust. The smell of freshly baked bread filling the kitchen. And, of course, that little moment of anticipation when you finally cut into the loaf and see how it turned out.

    Over time, I’ve learned that sourdough doesn’t have to be complicated to be beautiful.

    This is the recipe I use when I want two dependable artisan loaves with a crisp, blistered crust and a beautiful rise. It is primarily naturally leavened with sourdough starter, but I add one tiny helper:

    ¼ teaspoon of active dry yeast.

    Yes, yeast in sourdough. 😉

    And before the sourdough purists come for me, hear me out.

    That tiny amount gives my dough just a little extra boost and makes my bake more predictable without replacing the sourdough starter or the long fermentation that gives this bread its character.

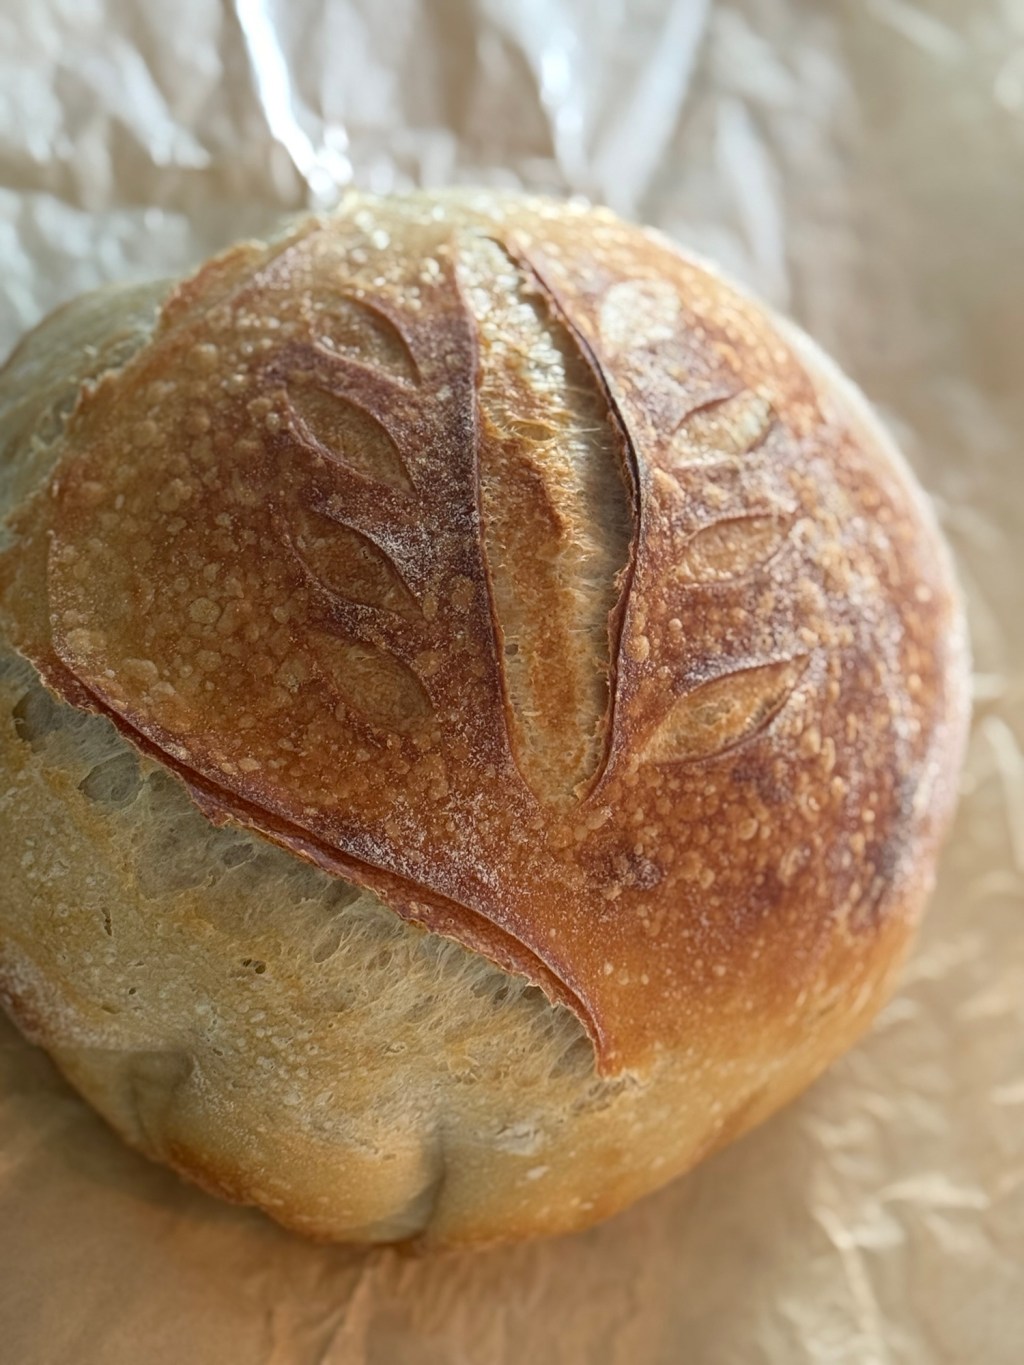
    The result is the loaf you see here: rustic, golden, beautifully scored, and made right in my own kitchen.

    Why I Add ¼ Teaspoon of Yeast to My Sourdough

    Traditional sourdough relies entirely on wild yeast and bacteria living in your starter.

    And I love traditional sourdough.

    But starters are living things. Their activity can change depending on the temperature of your kitchen, when they were last fed, the flour you’re using, and even the season.

    Adding just ¼ teaspoon of active dry yeast to two entire loaves gives the fermentation a gentle helping hand.

    It isn’t enough yeast to take over the recipe. My 250 grams of active sourdough starter is still the primary leavening, and I still give the dough plenty of time to ferment.

    Think of the yeast as a little insurance policy.

    It’s especially helpful if you’re:

    • Still learning sourdough
    • Working with a cooler kitchen
    • Not completely sure whether your starter is at peak activity
    • Baking for someone else and really need those loaves to turn out
    • Simply tired of wondering whether today’s loaf is going to cooperate 😂

    Sourdough is supposed to be something we enjoy making not something we’re afraid to get wrong.

    Two-Loaf Artisan Sourdough Recipe

    Makes: 2 large artisan loaves

    Ingredients

    • 250 g active sourdough starter
    • 700 g warm water
    • 1,000 g bread flour or unbleached all-purpose flour
    • 20 g fine sea salt
    • ¼ teaspoon active dry yeast

    That’s it.

    Five simple ingredients.

    Step 1: Mix the Starter, Water & Yeast

    Add 700 grams of warm water to a large mixing bowl.

    Add:

    • 250 g active sourdough starter
    • ¼ teaspoon active dry yeast

    Stir everything together.

    Don’t worry about completely dissolving the starter. We’re just distributing it throughout the water before adding our flour.

    A note about water temperature:You want pleasantly warm water, not hot water. Hot water can damage both the wild yeast in your starter and the commercial yeast we’re adding.


    Step 2: Add the Flour

    Add 1,000 grams of flour.

    Mix until the flour has absorbed the water and you no longer see large pockets of dry flour.

    At this point, your dough may look shaggy, sticky and honestly a little unimpressive.

    That’s perfectly fine.

    Cover the bowl and allow the dough to rest for approximately 30 minutes.

    This little rest gives the flour time to hydrate before we add our salt and begin developing the dough’s strength.

    Step 3: Add the Salt

    After the initial rest, sprinkle 20 grams of fine sea salt over the dough.

    With damp hands, work the salt into the dough.

    I like to pinch, squeeze and fold the dough until I can tell the salt has been evenly incorporated.

    Don’t worry about making it beautiful yet.

    That’s what our stretch and folds are for.

    Step 4: Stretch & Fold

    Now we’re going to build strength in our dough without traditional kneading.

    Grab one side of the dough and gently stretch it upward without tearing it.

    Fold it over the center.

    Turn the bowl and repeat.

    Continue until you’ve stretched and folded all four sides.

    Cover the bowl and rest for approximately 30 minutes.

    Repeat this process for a total of 3–4 sets of stretch and folds, approximately 30 minutes apart.

    You’ll notice something pretty amazing happen during this process.

    That shaggy dough you started with will gradually become smoother, stronger and much more elastic.

    Step 5: Bulk Fermentation

    After your final stretch and fold, cover the dough and allow it to continue fermenting at room temperature.

    This is one place where I don’t recommend becoming obsessed with an exact number of hours.

    Watch your dough, not just your clock.

    You’re looking for dough that:

    • Has noticeably increased in volume
    • Looks slightly domed
    • Has bubbles developing around the sides and surface
    • Feels airy
    • Has a gentle jiggle when you move the bowl

    Because this recipe contains that small amount of active dry yeast, fermentation can move faster than a 100% naturally leavened loaf.

    Don’t wait for the dough to completely double in size.

    If your kitchen is warm, check it earlier. If your house is cool, it may take longer.

    Step 6: Divide & Pre-Shape

    Turn your fermented dough onto a lightly floured work surface.

    Using a bench scraper, divide it into two equal pieces.

    Each portion should weigh approximately 985 grams, although small variations are completely fine.

    Gently shape each piece into a loose round.

    Allow the dough to rest on the counter for approximately 20 minutes.

    This gives the gluten a chance to relax before the final shaping.

    Step 7: Shape Your Loaves

    Shape each piece of dough into a boule or batard, creating enough surface tension that the outside feels smooth and taut without tearing.

    Place each loaf seam-side up into a well-floured banneton.

    Cover your bannetons and transfer them to the refrigerator.

    Allow the loaves to cold ferment overnight.

    This overnight rest develops flavor, but it also gives us another wonderful benefit:

    Cold sourdough is much easier to score.

    Step 8: Score & Bake

    The next day, preheat your oven to 450°F with your Dutch oven inside.

    You want the Dutch oven thoroughly heated before adding the bread.

    When you’re ready to bake, remove one loaf at a time from the refrigerator.

    Turn the cold dough onto parchment paper.

    Dust the top lightly with flour if you’d like that beautiful contrast in your scoring.

    Using a bread lame or very sharp razor, make one deeper expansion score along the loaf.

    Then add any decorative scoring you’d like.

    For the loaf pictured here, I used a simple leaf-inspired pattern alongside the main score.

    Don’t overthink decorative scoring.

    Homemade bread isn’t supposed to look factory-perfect. That’s part of what makes each loaf beautiful.

    Baking Time

    Carefully lower your scored loaf into the hot Dutch oven.

    Cover and bake:

    25 minutes at 450°F with the lid ON

    Then remove the lid and bake:

    20–25 minutes at 450°F with the lid OFF

    The uncovered portion is where that gorgeous golden crust really develops.

    I like my artisan bread deeply golden rather than pale, so don’t be afraid to give it another few minutes if needed.

    Repeat with your second loaf.

    The Secret to That Blistered Sourdough Crust

    Those tiny bubbles covering the crust are one of my favorite parts of a good loaf.

    A long, cold overnight fermentation helps create that beautiful blistering.

    The covered Dutch oven also traps the steam naturally released from the dough during the beginning of the bake. That humid environment allows the loaf to fully expand before the crust becomes firm.

    Once the lid comes off, the moisture escapes and the crust begins to brown and crisp.

    No complicated steam trays required.

    Please Let Your Bread Cool

    I know.

    You’ve waited all this time, your kitchen smells incredible, and now I’m telling you not to cut it.

    But give your loaf at least one hour to cool before slicing.

    The inside of the bread is still finishing its work when it comes out of the oven. Cutting into it immediately can leave the crumb gummy or compressed.

    Put it on a cooling rack.

    Admire your handiwork.

    Then go find something else to do. 😂

    It will be worth the wait.

    A Few Things I’ve Learned About Sourdough

    Sourdough has a way of teaching you to pay attention.

    A recipe can tell you to ferment something for five hours, but your dough may be ready in four or it may need seven.

    Your kitchen isn’t my kitchen.

    Your starter isn’t my starter.

    Your flour, water and even the temperature outside can change how your dough behaves.

    That’s why one of the best things you can learn as a sourdough baker is simply what ready dough looks and feels like.

    And if adding ¼ teaspoon of yeast makes your bread more reliable while you’re learning?

    Add the yeast.

    There are no sourdough police hiding in your pantry. 😉

    Two-Loaf Artisan Sourdough — Quick Recipe

    250 g active sourdough starter
    700 g warm water
    1,000 g flour
    20 g fine sea salt
    ¼ teaspoon active dry yeast

    Mix starter, water and yeast.

    Add flour and mix until no dry flour remains.

    Rest 30 minutes.

    Add salt.

    Complete 3–4 sets of stretch and folds approximately 30 minutes apart.

    Bulk ferment until noticeably risen, airy and jiggly.

    Divide into two loaves.

    Pre-shape and rest 20 minutes.

    Final shape and place into bannetons.

    Cold ferment overnight.

    Bake in a preheated Dutch oven at 450°F for 25 minutes covered + 20–25 minutes uncovered.

    Cool at least one hour before slicing.

    From My Kitchen to Yours

    There is a reason breadmaking has survived generations.

    Flour, water, salt and time can become something that feeds your family, fills your home with the most incredible smell, and connects us to a way of cooking that existed long before convenience foods filled grocery-store shelves.

    It doesn’t have to be perfect.

    It doesn’t have to follow someone else’s sourdough rules.

    It just needs to work for your home and your family.

    And this little ¼-teaspoon trick has earned a permanent place in my sourdough routine.

    Happy baking. 🤎

    — Sandrock Apothecary

  • Finding a Multipurpose Cleaner I Can Actually Use: doTERRA abōde

    Finding a Multipurpose Cleaner I Can Actually Use: doTERRA abōde

    Finding a household cleaner used to be pretty simple. Does it clean well? Does it smell good? Great.

    Living with MCAS, POTS, and Interstitial Cystitis (IC) changed that for me.

    Now I pay much closer attention to the products I bring into my home. Something being marketed as “natural,” “green,” or “clean” doesn’t necessarily mean that my body is going to tolerate it. And I’ve learned that the products that work for someone else with sensitivities aren’t automatically going to work for me.

    One cleaner that I personally use and tolerate well is doTERRA’s abōde Multi-Purpose Surface Cleaner Concentrate.

    What is doTERRA abōde Multi-Purpose Surface Cleaner?

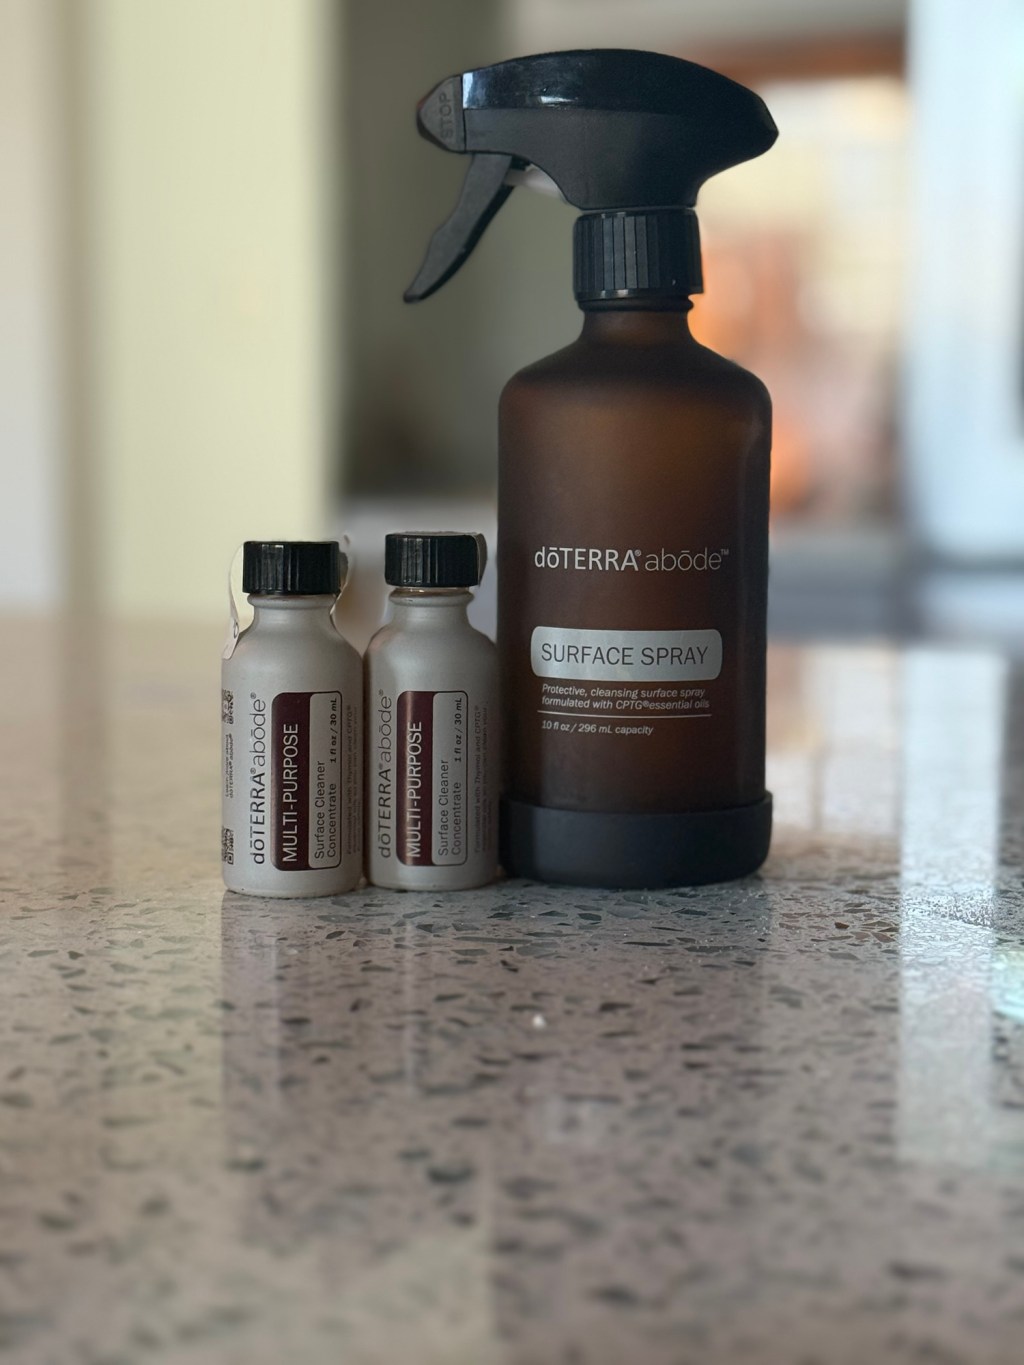
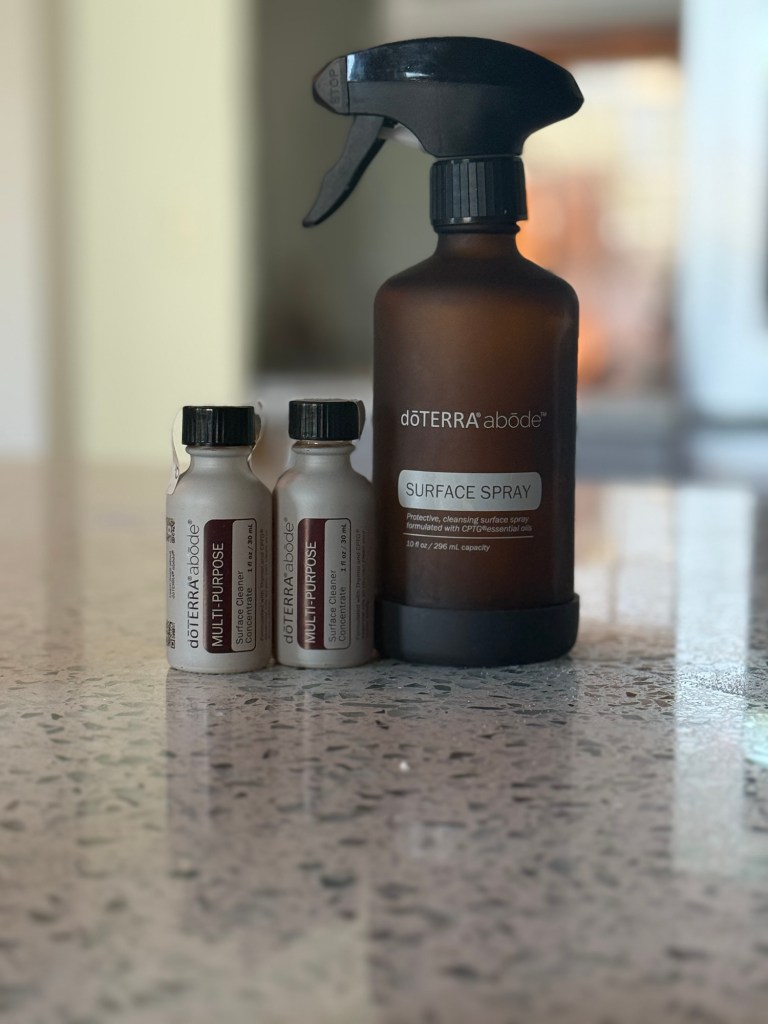
    The first thing that always makes me laugh is the size. Those little bottles in the photo really are the cleaner. 😂

    Each bottle contains 1 fl oz (30 mL) of concentrated surface cleaner. Rather than purchasing another full-size bottle every time I run out, I dilute the concentrate with water in my reusable abōde spray bottle.

    I like concentrates for a practical reason: I’m not storing bottle after bottle of mostly water. The concentrates take up very little room, and I reuse the same spray bottle.

    The cleaner itself is formulated for everyday household cleaning—things like grease, grime, spills, fingerprints and everyday messes.

    And with a busy kitchen, there are plenty of those around here. 😂

    Why I Use It in My Home

    For me, a cleaning product has to check two boxes:

    It actually needs to clean, and I need to be able to tolerate using it.

    That second part has become increasingly important.

    I don’t exclusively use doTERRA products in my home. I recently shared some of the Rustic Strength products I use, I still use alcohol for certain cleaning jobs, and I make several of my own cleaning products.

    I’m not interested in making everything in my cleaning cabinet match.

    I’m interested in finding individual products that work well for my home and work well for me.

    abōde happens to be one of them.

    A Note About MCAS & Product Sensitivities

    This part is important.

    When I say that I tolerate a product, I’m talking about my personal experience.

    MCAS triggers can be incredibly individual. A fragrance, essential oil, botanical ingredient or cleaning ingredient that doesn’t bother one person may be a problem for someone else.

    That’s why I don’t like labeling household products as universally “MCAS-safe.”

    Instead, I’ll tell you what I use, what has worked for me, and why I’ve chosen it—and you can use that information as one piece of your own research.

    I’ve Actually Used doTERRA for a Long Time

    doTERRA isn’t something I discovered after developing sensitivities.

    I’ve been using doTERRA since 2012, through a lot of different seasons of life. There were years when I bought more and seasons when I could afford maybe one thing that month.

    Looking back, I’m incredibly grateful that I already knew these products by the time I became much more limited in what I could comfortably use.

    That doesn’t mean every doTERRA product is right for me, or that everyone else will tolerate the things I do.

    It simply means that abōde is one of the products that has earned a place in my home.

    Where to Find It

    If you’d like to read more about the abōde Multi-Purpose Surface Cleaner Concentrate, including the current ingredients and product information, you can find it through my doTERRA shop.

    Whole sale link below and free 1 year membership.

    https://link.doterra.com/UtcA_t

    Don’t want a membership? I totally get it, here is the link just to purchase below.

    https://link.doterra.com/kuZmw2

    Disclosure: I am a doTERRA Wellness Advocate and have been with doTERRA since around 2011/2012. If you purchase doTERRA products through my shop, I earn commission from your purchase. The experiences shared above are my own and aren’t a guarantee that another person with MCAS, POTS, IC, or other sensitivities will tolerate the same products.

  • 🌿 Living Between the Lines: Navigating Life with POTS, MCAS, and IC

    🌿 Living Between the Lines: Navigating Life with POTS, MCAS, and IC

    Some days, it starts with a flutter. A racing heart when I stand, a wave of heat, a fog thick enough to forget why I walked into the room. Other days, it’s an itchy throat, a flush creeping across my skin, or a sudden reaction to a food I’ve eaten a hundred times before.

    This is the delicate dance of living with POTS (Postural Orthostatic Tachycardia Syndrome), MCAS (Mast Cell Activation Syndrome), and Interstitial Cystitis (IC) three conditions that have changed the way I move through the world and taught me to embrace a slower, gentler way of living.

    🌬 The Body That Won’t Stay Still

    POTS is more than a fast heartbeat. It’s dizziness, fatigue, nausea, brain fog, and a nervous system that sometimes forgets how to regulate the basics, like standing upright. For many of us, the simple act of getting out of bed can feel like climbing a mountain.

    Pair that with MCAS, where the immune system can react to foods, fragrances, stress, or environmental triggers, and life becomes wonderfully unpredictable in all the wrong ways. Then there’s Interstitial Cystitis, adding another layer of challenges that often aren’t visible to anyone else.

    These illnesses don’t always announce themselves loudly. Sometimes they whisper. Sometimes they roar. And often, they ask us to slow down when the rest of the world keeps moving.

    🌿 Listening to the Body’s Whispers

    Living with chronic illness has taught me to listen more closely to my body than I ever imagined I would.

    My body isn’t my enemy, it’s communicating in a language I’m still learning. Every symptom is information. Every flare is an invitation to pay attention, adjust, and extend myself a little more grace.

    Through it all, my faith has reminded me that even in seasons of weakness, there is purpose, grace, and hope. Those quiet moments have shaped not only how I care for my health but also how I care for my home and my family.

    It’s what led me toward slower living, nourishing foods, herbs, and creating a home that supports healing rather than constantly overwhelming the nervous system. Not because I believe there’s a perfect cure, but because I’ve found peace in living more intentionally.

    🍃 What Helps Me Feel More Like Myself

    Over time, I’ve discovered that the smallest, most consistent habits often make the biggest difference.

    • Whole, homemade meals prepared with simple ingredients while avoiding many of my personal triggers.
    • Herbs such as quercetin, nettle, and ginger have become part of my wellness routine alongside the guidance of my healthcare team.
    • Daily grounding rituals, time in nature, quiet moments of prayer, gentle movement, foot baths, and creating space for my nervous system to rest.
    • Clean electrolytes without unnecessary additives have become one of my lifelines on difficult POTS days.
    • Reading ingredient labels carefully because preservatives, sulfites, artificial dyes, and hidden ingredients can make a real difference for me.

    What helps me may not be what helps someone else, and that’s okay. Every journey is different. These are simply the practices that have brought greater peace and stability into my own life.

    🌾 You’re Not Alone Here

    If you’re walking this road too, I want you to know something.

    Your symptoms are real.

    You’re not imagining them.

    You’re not alone.

    Living with chronic illness isn’t easy, and healing isn’t always a straight path. But even in the hardest seasons, it’s possible to create a life filled with beauty, purpose, and moments of peace.

    Sandrock Apothecary was born from this journey, not simply as a place to share recipes or herbal traditions, but as a place where we can embrace slower living, support one another, and remember that our worth isn’t measured by our health.

    My hope is that whether you’re here because of POTS, MCAS, IC, fresh-milled baking, herbal education, or simply a desire for a quieter way of life, you’ll find encouragement, practical ideas, and a reminder that you don’t have to walk this path alone.

    If you’re just beginning your journey, start small. Stay hydrated. Keep a food and symptom journal. Celebrate every little victory. And above all, be gentle with yourself.

    Thank you for being here. I’m grateful our paths have crossed.

    With heart,

    Lacey
    Sandrock Apothecary

  • The Beginning of Something Honest

    The Beginning of Something Honest

    Out here, between the trees and the hum of the earth, there’s a cottage where old ways are honored and nature still has a voice.

    Not so long ago, I began to feel like a stranger in my own body.

    After being diagnosed with Postural Orthostatic Tachycardia Syndrome (POTS), Mast Cell Activation Syndrome (MCAS), and Interstitial Cystitis (IC), I had no choice but to slow down and pay attention. The dizziness, the fatigue, the racing heart, the reactions to foods and everyday products, and the constant discomfort made me question everything I thought I knew about health. Those diagnoses didn’t just change how I moved through each day, they changed the way I saw the world.

    I began looking more closely at the things we bring into our homes and our bodies: the food we eat, the ingredients we put on our skin, the products we clean with, and the choices we make every single day. The more I learned, the more I realized how disconnected we’d become from the simple things that once nourished us.

    What I found was unsettling, but it also awakened something in me, a quiet determination to return to a slower, more intentional way of living. One rooted in real food, herbal traditions, and caring for both our homes and ourselves with greater purpose.

    That journey became the foundation of Sandrock Apothecary.

    This blog is where I want to share more than recipes and remedies. It’s where I’ll share the stories behind them, the lessons I’ve learned, the mistakes I’ve made, and the little moments that continue to shape this life.

    My hope is that you’ll find a piece of yourself here. Whether you’re navigating chronic illness, searching for balance, learning old-fashioned skills, or simply longing for a slower, more intentional way of living, you’re welcome here.

    This isn’t about perfection.

    It’s about coming home to ourselves, to the land, and to the quiet rhythms that remind us what truly matters.

    Thank you for being here.

    — Lacey